


📅 Updated: June 7, 2026 (Originally published: January 25, 2026)
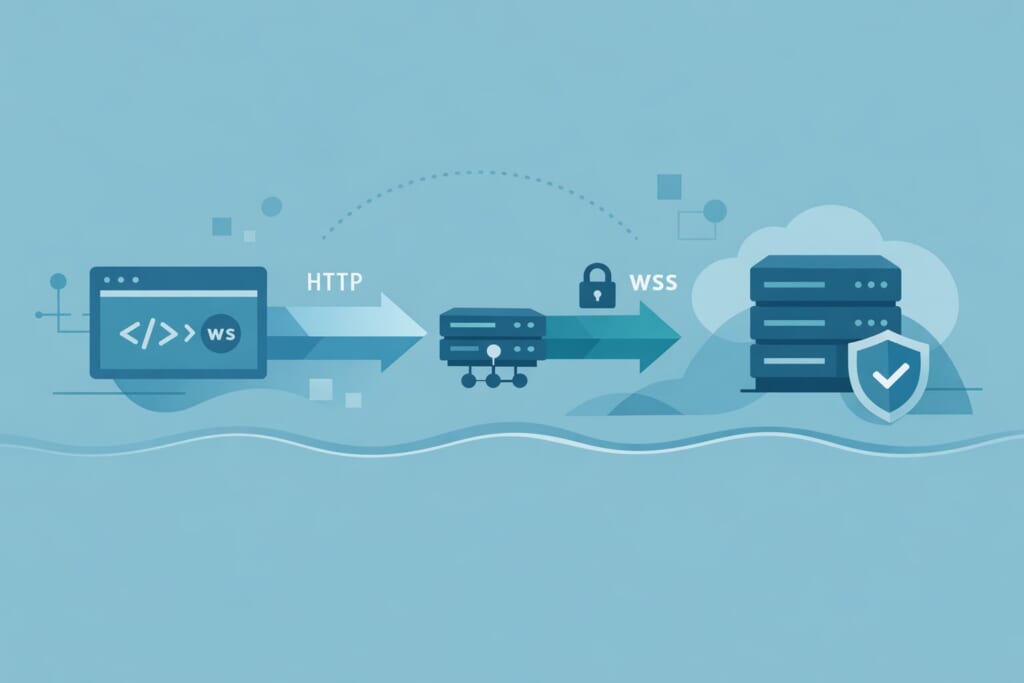
WebSocket connections enable real-time, bidirectional communication between browsers and servers. An NGINX WebSocket proxy sits between your clients and WebSocket backend, handling the HTTP-to-WebSocket upgrade and forwarding messages in both directions. This architecture is essential for chat applications, live dashboards, collaborative tools, and any application using Socket.io, ws, or similar libraries.
This complete guide covers everything you need to configure NGINX as a WebSocket proxy—from understanding the upgrade mechanism to production-ready SSL/TLS configurations for secure wss:// connections.
Why WebSocket Proxying is Different
Unlike regular HTTP requests, WebSocket connections start as HTTP but upgrade to a persistent, full-duplex protocol. This upgrade mechanism is defined in RFC 6455 and requires special handling in your NGINX WebSocket proxy configuration.
A standard HTTP request flows like this:
1. Client sends request
2. Server processes and responds
3. Connection closes (or reuses via Keep-Alive)
WebSocket connections work differently:
1. Client sends HTTP request with Upgrade: websocket header
2. Server responds with 101 Switching Protocols
3. Connection stays open for bidirectional messaging
4. Either side can send data at any time
Why developers struggle with NGINX WebSocket proxy configuration:
- The
UpgradeandConnectionheaders are hop-by-hop headers, not forwarded by default - HTTP/1.0 doesn’t support the upgrade mechanism—HTTP/1.1 is required
- Default timeouts disconnect idle WebSocket connections
- NGINX’s default configuration explicitly clears the
Upgradeheader
How NGINX Handles WebSocket Upgrades Internally
Understanding how NGINX implements WebSocket proxying helps you configure it correctly. Looking at the NGINX source code reveals the exact mechanism.
The Upgrade Header Processing
NGINX parses the Upgrade header from incoming requests and stores it in r->headers_in.upgrade. When you configure proxy_set_header Upgrade $http_upgrade, NGINX forwards this header to your backend.
Why HTTP/1.1 is Required
The NGINX proxy module supports two HTTP versions for backend communication:
static ngx_conf_enum_t  ngx_http_proxy_http_version[] = {
    { ngx_string("1.0"), NGX_HTTP_VERSION_10 },
    { ngx_string("1.1"), NGX_HTTP_VERSION_11 },
    { ngx_null_string, 0 }
};
HTTP/1.0 cannot perform protocol upgrades. Your NGINX WebSocket proxy must use proxy_http_version 1.1 for WebSocket connections to work.
Default Headers Block WebSocket
NGINX’s proxy module defines default headers that explicitly clear the Upgrade header:
static ngx_keyval_t  ngx_http_proxy_headers[] = {
    { ngx_string("Host"), ngx_string("$proxy_host") },
    { ngx_string("Connection"), ngx_string("close") },
    // ...
    { ngx_string("Upgrade"), ngx_string("") },  /* Cleared by default */
    { ngx_null_string, ngx_null_string }
};
This is why you must explicitly configure proxy_set_header Upgrade $http_upgrade in your NGINX WebSocket proxy—the default behavior prevents WebSocket upgrades entirely.
The 101 Switching Protocols Response
When your backend responds with status 101, NGINX detects this and switches to upgrade mode:
if (u->headers_in.status_n == NGX_HTTP_SWITCHING_PROTOCOLS) {
    u->keepalive = 0;  // Disable keep-alive for upgraded connections
    if (r->headers_in.upgrade) {
        u->upgrade = 1;  // Enable upgrade mode
    }
}
Once u->upgrade is set, NGINX transitions to bidirectional tunnel mode, forwarding data in both directions without HTTP framing.
Installing NGINX
Before configuring your NGINX WebSocket proxy, ensure NGINX is installed.
On RHEL-based distributions (Rocky Linux, AlmaLinux, CentOS Stream):
dnf install nginx
systemctl enable --now nginx
On Debian/Ubuntu:
apt install nginx
systemctl enable --now nginx
Basic NGINX WebSocket Proxy Configuration
The minimal configuration for proxying WebSocket connections requires four essential directives. See the official NGINX proxy module documentation for complete directive reference.
map $http_upgrade $connection_upgrade {
    default upgrade;
    ""      close;
}

server {
    listen 80;
    server_name example.com;

    location /ws/ {
        proxy_pass http://127.0.0.1:3000;
        proxy_http_version 1.1;
        proxy_set_header Upgrade $http_upgrade;
        proxy_set_header Connection $connection_upgrade;
    }
}
Understanding Each Directive
map $http_upgrade $connection_upgrade
This creates a variable that sets Connection: upgrade when the client sends an Upgrade header, or Connection: close otherwise. This is critical because:
- WebSocket clients send
Connection: Upgrade - Regular HTTP clients don’t send an
Upgradeheader - Using
"upgrade"unconditionally would break non-WebSocket requests
proxy_http_version 1.1
Forces HTTP/1.1 for backend communication. HTTP/1.0 uses Connection: close by default and cannot perform protocol upgrades. Without this directive, your NGINX WebSocket proxy will fail.
proxy_set_header Upgrade $http_upgrade
Forwards the client’s Upgrade header to the backend. The $http_upgrade variable contains the original header value (typically “websocket”).
proxy_set_header Connection $connection_upgrade
Sets the Connection header based on the map defined earlier. For WebSocket requests, this becomes Connection: upgrade.
Complete Production Configuration
A production NGINX WebSocket proxy needs additional headers and timeout settings:
map $http_upgrade $connection_upgrade {
    default upgrade;
    ""      close;
}

upstream websocket_backend {
    server 127.0.0.1:3000;
    keepalive 64;
}

server {
    listen 80;
    server_name example.com;

    location /ws/ {
        proxy_pass http://websocket_backend;
        proxy_http_version 1.1;
        proxy_set_header Upgrade $http_upgrade;
        proxy_set_header Connection $connection_upgrade;
        proxy_set_header Host $host;
        proxy_set_header X-Real-IP $remote_addr;
        proxy_set_header X-Forwarded-For $proxy_add_x_forwarded_for;
        proxy_set_header X-Forwarded-Proto $scheme;
        proxy_read_timeout 86400s;
        proxy_send_timeout 86400s;
    }

    location / {
        proxy_pass http://websocket_backend;
        proxy_http_version 1.1;
        proxy_set_header Connection "";
        proxy_set_header Host $host;
        proxy_set_header X-Real-IP $remote_addr;
        proxy_set_header X-Forwarded-For $proxy_add_x_forwarded_for;
        proxy_set_header X-Forwarded-Proto $scheme;
    }
}
Header Explanations
| Header | Purpose |
|---|---|
Host |
Original host requested by client |
X-Real-IP |
Client’s actual IP address |
X-Forwarded-For |
Chain of proxy IPs including client |
X-Forwarded-Proto |
Original protocol (http or https) |
Timeout Configuration for Long-Lived Connections
WebSocket connections remain open indefinitely. The default NGINX timeouts are 60 seconds:
ngx_conf_merge_msec_value(conf->upstream.send_timeout,
                          prev->upstream.send_timeout, 60000);
ngx_conf_merge_msec_value(conf->upstream.read_timeout,
                          prev->upstream.read_timeout, 60000);
With 60-second timeouts, idle WebSocket connections disconnect after one minute. For production WebSocket applications, increase these timeouts significantly:
proxy_read_timeout 86400s;  # 24 hours
proxy_send_timeout 86400s;  # 24 hours
Important: These timeouts measure time between operations, not total connection time. A WebSocket receiving periodic messages resets the read timeout with each message.
Secure WebSocket Proxy with SSL/TLS (wss://)
Production applications require secure WebSocket connections (wss://). Your NGINX wss configuration handles TLS termination while proxying to an unencrypted backend:
map $http_upgrade $connection_upgrade {
    default upgrade;
    ""      close;
}

upstream websocket_backend {
    server 127.0.0.1:3000;
    keepalive 64;
}

server {
    listen 443 ssl;
    server_name example.com;

    ssl_certificate /etc/letsencrypt/live/example.com/fullchain.pem;
    ssl_certificate_key /etc/letsencrypt/live/example.com/privkey.pem;
    ssl_protocols TLSv1.2 TLSv1.3;
    ssl_ciphers ECDHE-ECDSA-AES128-GCM-SHA256:ECDHE-RSA-AES128-GCM-SHA256;
    ssl_prefer_server_ciphers off;
    ssl_session_cache shared:SSL:10m;
    ssl_session_timeout 1d;

    location /ws/ {
        proxy_pass http://websocket_backend;
        proxy_http_version 1.1;
        proxy_set_header Upgrade $http_upgrade;
        proxy_set_header Connection $connection_upgrade;
        proxy_set_header Host $host;
        proxy_set_header X-Real-IP $remote_addr;
        proxy_set_header X-Forwarded-For $proxy_add_x_forwarded_for;
        proxy_set_header X-Forwarded-Proto $scheme;
        proxy_read_timeout 86400s;
        proxy_send_timeout 86400s;
    }

    location / {
        proxy_pass http://websocket_backend;
        proxy_http_version 1.1;
        proxy_set_header Connection "";
        proxy_set_header Host $host;
        proxy_set_header X-Real-IP $remote_addr;
        proxy_set_header X-Forwarded-For $proxy_add_x_forwarded_for;
        proxy_set_header X-Forwarded-Proto $scheme;
    }
}

server {
    listen 80;
    server_name example.com;
    return 301 https://$host$request_uri;
}
Why NGINX wss Proxying Works This Way
With this NGINX wss configuration:
- Clients connect to
wss://example.com/ws/ - NGINX terminates TLS
- NGINX proxies to backend over unencrypted HTTP/WebSocket
- Backend doesn’t need TLS configuration
This is more efficient than end-to-end encryption because:
- Backend servers don’t need certificates
- TLS termination happens once at the edge
- Certificate management is centralized
- Backend can run on localhost without security concerns
Obtaining SSL Certificates
Use Certbot for free Let’s Encrypt certificates:
dnf install certbot python3-certbot-nginx
certbot --nginx -d example.com
Certbot automatically configures NGINX with valid certificates and sets up auto-renewal.
Socket.io Configuration
Socket.io is one of the most popular WebSocket libraries. It requires special handling because it uses both HTTP polling and WebSocket transport. Configure your NGINX WebSocket proxy for Socket.io like this:
map $http_upgrade $connection_upgrade {
    default upgrade;
    ""      close;
}

upstream socketio_backend {
    ip_hash;
    server 127.0.0.1:3000;
    server 127.0.0.1:3001;
    keepalive 64;
}

server {
    listen 443 ssl;
    server_name example.com;

    ssl_certificate /etc/letsencrypt/live/example.com/fullchain.pem;
    ssl_certificate_key /etc/letsencrypt/live/example.com/privkey.pem;
    ssl_protocols TLSv1.2 TLSv1.3;

    location /socket.io/ {
        proxy_pass http://socketio_backend;
        proxy_http_version 1.1;
        proxy_set_header Upgrade $http_upgrade;
        proxy_set_header Connection $connection_upgrade;
        proxy_set_header Host $host;
        proxy_set_header X-Real-IP $remote_addr;
        proxy_set_header X-Forwarded-For $proxy_add_x_forwarded_for;
        proxy_set_header X-Forwarded-Proto $scheme;
        proxy_read_timeout 86400s;
        proxy_send_timeout 86400s;
        proxy_buffering off;
    }
}
Key Socket.io Considerations
ip_hash for Session Affinity
Socket.io starts with HTTP long-polling before upgrading to WebSocket. Without session affinity, polling requests might hit different servers, breaking the connection handshake.
proxy_buffering off
Disabling buffering ensures Socket.io’s polling transport receives responses immediately. With buffering enabled, long-polling responses might be delayed.
Path Configuration
Socket.io defaults to the /socket.io/ path. If your application uses a custom path, adjust the location block accordingly.
Load Balancing WebSocket Connections
When running multiple WebSocket backend servers, your NGINX WebSocket proxy configuration needs special attention:
map $http_upgrade $connection_upgrade {
    default upgrade;
    ""      close;
}

upstream websocket_cluster {
    ip_hash;
    server 192.168.1.10:3000 weight=5 max_fails=3 fail_timeout=30s;
    server 192.168.1.11:3000 weight=3 max_fails=3 fail_timeout=30s;
    server 192.168.1.12:3000 backup;
    keepalive 64;
}

server {
    listen 443 ssl;
    server_name example.com;

    ssl_certificate /etc/letsencrypt/live/example.com/fullchain.pem;
    ssl_certificate_key /etc/letsencrypt/live/example.com/privkey.pem;

    location /ws/ {
        proxy_pass http://websocket_cluster;
        proxy_http_version 1.1;
        proxy_set_header Upgrade $http_upgrade;
        proxy_set_header Connection $connection_upgrade;
        proxy_set_header Host $host;
        proxy_set_header X-Real-IP $remote_addr;
        proxy_read_timeout 86400s;
        proxy_send_timeout 86400s;

        proxy_next_upstream error timeout;
        proxy_next_upstream_tries 3;
    }
}
Load Balancing Methods for WebSocket
ip_hash (Recommended for WebSocket)
Ensures the same client always connects to the same backend. Critical when backends maintain per-connection state.
least_conn
Sends connections to the server with fewest active connections. Works well when backends share state via Redis or similar.
Round Robin (Default)
Not recommended for WebSocket unless backends are completely stateless and share all state externally.
Failover Configuration
The proxy_next_upstream directive controls failover behavior:
proxy_next_upstream error timeout;
proxy_next_upstream_tries 3;
proxy_next_upstream_timeout 30s;
This retries failed connections up to 3 times within 30 seconds. Note that WebSocket connections cannot be transparently failed over—clients must reconnect.
Performance Optimization
TCP_NODELAY for Low Latency
NGINX automatically enables TCP_NODELAY when switching to upgrade mode, as seen in the source code:
if (clcf->tcp_nodelay) {
    if (ngx_tcp_nodelay(c) != NGX_OK) {
        ngx_http_upstream_finalize_request(r, u, NGX_ERROR);
        return;
    }
}
This disables Nagle’s algorithm, reducing latency for small WebSocket messages. Ensure tcp_nodelay on; in your configuration (it’s enabled by default in the http context).
Keepalive Connections
Maintain persistent connections to backends:
upstream websocket_backend {
    server 127.0.0.1:3000;
    keepalive 64;
    keepalive_requests 10000;
    keepalive_timeout 60s;
}
The keepalive 64 directive maintains up to 64 idle connections per worker process, reducing connection establishment overhead.
Buffer Settings
For most WebSocket applications, default buffer settings work well. However, if your application sends large messages, consider:
location /ws/ {
    proxy_pass http://websocket_backend;
    # ... other directives ...

    proxy_buffer_size 8k;
    proxy_buffers 8 8k;
}
Troubleshooting Common Issues
Connection Drops After 60 Seconds
Symptom: WebSocket connections close after approximately one minute of inactivity.
Cause: Default proxy_read_timeout is 60 seconds.
Solution:
proxy_read_timeout 86400s;
proxy_send_timeout 86400s;
400 Bad Request
Symptom: WebSocket connections fail immediately with 400 error.
Cause: Missing or incorrect Upgrade and Connection headers.
Solution: Ensure these directives are present:
proxy_http_version 1.1;
proxy_set_header Upgrade $http_upgrade;
proxy_set_header Connection $connection_upgrade;
502 Bad Gateway
Symptom: WebSocket connections fail with 502 error.
Cause: Backend not running or connection refused.
Solution:
# Check if backend is listening
ss -tlnp | grep 3000

# Check NGINX error log
tail -f /var/log/nginx/error.log
WebSocket Works Locally But Not Through NGINX
Symptom: Direct connections to backend work, but proxied connections fail.
Cause: Missing proxy_http_version 1.1 or header configuration.
Solution: Verify complete configuration:
location /ws/ {
    proxy_pass http://backend;
    proxy_http_version 1.1;  # Required!
    proxy_set_header Upgrade $http_upgrade;
    proxy_set_header Connection $connection_upgrade;
}
SELinux Blocking Connections
On RHEL-based systems, SELinux might block NGINX from connecting to backends:
# Check for SELinux denials
ausearch -m avc -ts recent | grep nginx

# Allow NGINX to make network connections
setsebool -P httpd_can_network_connect 1
Testing Your Configuration
Verify your NGINX WebSocket proxy configuration with curl:
# Test WebSocket upgrade
curl -v -H "Upgrade: websocket"
     -H "Connection: Upgrade"
     -H "Sec-WebSocket-Key: dGhlIHNhbXBsZSBub25jZQ=="
     -H "Sec-WebSocket-Version: 13"
     http://localhost/ws/

# Expected response: HTTP/1.1 101 Switching Protocols
Check configuration syntax before reloading:
nginx -t
nginx -s reload
Real-World Examples
Node.js with ws Library
Backend (app.js):
const WebSocket = require('ws');
const wss = new WebSocket.Server({ port: 3000 });

wss.on('connection', (ws) => {
    console.log('Client connected');
    ws.on('message', (message) => {
        ws.send(`Echo: ${message}`);
    });
});
NGINX configuration:
upstream nodejs_ws {
    server 127.0.0.1:3000;
    keepalive 64;
}

server {
    listen 443 ssl;
    server_name api.example.com;

    ssl_certificate /etc/letsencrypt/live/api.example.com/fullchain.pem;
    ssl_certificate_key /etc/letsencrypt/live/api.example.com/privkey.pem;

    location /ws/ {
        proxy_pass http://nodejs_ws;
        proxy_http_version 1.1;
        proxy_set_header Upgrade $http_upgrade;
        proxy_set_header Connection $connection_upgrade;
        proxy_set_header Host $host;
        proxy_set_header X-Real-IP $remote_addr;
        proxy_read_timeout 86400s;
    }
}
Python with websockets Library
Backend (app.py):
import asyncio
import websockets

async def echo(websocket):
    async for message in websocket:
        await websocket.send(f"Echo: {message}")

async def main():
    async with websockets.serve(echo, "localhost", 3000):
        await asyncio.Future()

asyncio.run(main())
The NGINX configuration remains the same—it’s backend-agnostic.
Go with gorilla/websocket
Backend (main.go):
package main

import (
    "net/http"
    "github.com/gorilla/websocket"
)

var upgrader = websocket.Upgrader{}

func echo(w http.ResponseWriter, r *http.Request) {
    c, _ := upgrader.Upgrade(w, r, nil)
    defer c.Close()
    for {
        mt, message, _ := c.ReadMessage()
        c.WriteMessage(mt, message)
    }
}

func main() {
    http.HandleFunc("/ws/", echo)
    http.ListenAndServe(":3000", nil)
}
Security Best Practices
Rate Limiting WebSocket Connections
Prevent connection flooding:
limit_conn_zone $binary_remote_addr zone=ws_conn:10m;

server {
    location /ws/ {
        limit_conn ws_conn 10;  # Max 10 connections per IP

        proxy_pass http://websocket_backend;
        # ... rest of configuration
    }
}
Origin Validation
While your application should validate the Origin header, you can add a layer of defense in NGINX:
location /ws/ {
    if ($http_origin !~* "^https://(www.)?example.com$") {
        return 403;
    }

    proxy_pass http://websocket_backend;
    # ... rest of configuration
}
Request Size Limits
Protect against memory exhaustion:
location /ws/ {
    client_max_body_size 64k;

    proxy_pass http://websocket_backend;
    # ... rest of configuration
}
Summary
Configuring an NGINX WebSocket proxy requires understanding the HTTP upgrade mechanism and its specific requirements:
- HTTP/1.1 is mandatory —
proxy_http_version 1.1must be set - Headers require explicit configuration — NGINX clears
Upgradeby default - Timeouts need adjustment — increase
proxy_read_timeoutfor long-lived connections - The map directive handles both WebSocket and regular requests — dynamically sets the
Connectionheader
For secure wss:// connections, NGINX handles TLS termination efficiently, allowing backends to run without SSL configuration.
The key configuration elements are:
map $http_upgrade $connection_upgrade {
    default upgrade;
    ""      close;
}

location /ws/ {
    proxy_pass http://backend;
    proxy_http_version 1.1;
    proxy_set_header Upgrade $http_upgrade;
    proxy_set_header Connection $connection_upgrade;
    proxy_read_timeout 86400s;
}
Start with this foundation and add headers, load balancing, and security measures as your application requires. Always test with nginx -t before reloading, and monitor your error logs when troubleshooting WebSocket connection issues.
For related topics, see our guides on NGINX reverse proxy configuration and fixing 504 Gateway Timeout errors.
Proxy targets change; security checks should not lag. Continuous gixy scanning keeps the proxy surface accountable. GetPageSpeed Amplify runs scheduled gixy scans across every host and ties findings to live NGINX runtime metrics. Drop-in compatible with the deprecated nginx-amplify-agent (EOL January 2026).