


📅 Updated: June 7, 2026 (Originally published: March 16, 2026)
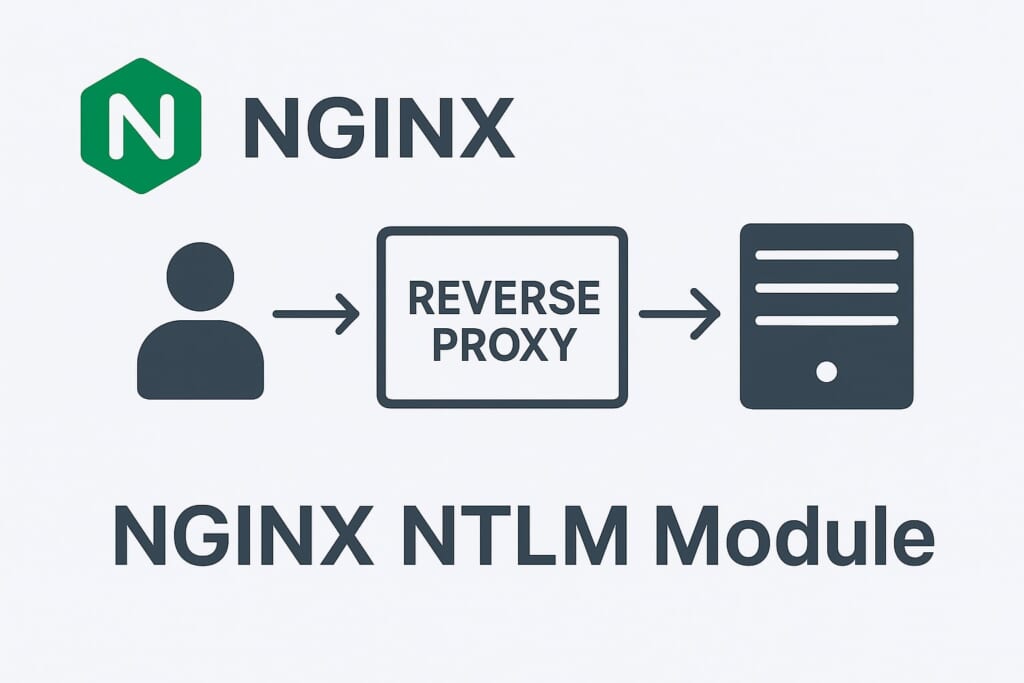
NGINX’s standard reverse proxy behavior creates a new upstream connection for each client request. This works well for stateless protocols, but breaks authentication schemes that require multiple exchanges over the same connection — specifically NTLM and Negotiate (Kerberos/SPNEGO). The NGINX NTLM module solves this problem by binding upstream connections to specific clients during the authentication handshake.
If you run NGINX in front of IIS, Exchange Server, SharePoint, or any Windows service that uses NTLM authentication, the NGINX NTLM module is essential. Without it, the multi-step NTLM handshake fails because NGINX forwards each step of the negotiation to a different upstream connection, losing the authentication context.
Why Standard NGINX Proxying Breaks NTLM
NTLM authentication is a challenge-response protocol that requires three HTTP exchanges over the same TCP connection:
- Type 1 (Negotiate): The client sends an
Authorization: NTLM <base64>header to initiate authentication. - Type 2 (Challenge): The server responds with a
WWW-Authenticate: NTLM <challenge>header containing a server challenge. - Type 3 (Authenticate): The client sends credentials encrypted with the challenge back to the server.
Each step must reach the same backend process over the same TCP connection. However, NGINX’s default behavior opens a new connection to the upstream for each proxied request. Even with the native keepalive directive enabled, NGINX may reuse a cached connection for any client — not necessarily the one that started the NTLM handshake.
The NGINX NTLM module changes this behavior. When it detects an Authorization header starting with NTLM or Negotiate, it binds the upstream connection to that specific client connection. All subsequent requests from the same client reuse the same upstream connection, preserving the authentication state until the client disconnects or the connection times out.
How the NGINX NTLM Module Works
The module operates at the upstream peer selection level. It wraps NGINX’s standard round-robin load balancer and adds connection tracking logic:
- Detection: When a request arrives, the module inspects the
Authorizationheader. If the value begins withNTLMorNegotiate, the module flags this client connection for binding. - Binding: After the upstream connection is established, the module stores a mapping between the client connection and the upstream connection in an internal cache.
- Reuse: On subsequent requests from the same client, the module looks up the cache and returns the previously bound upstream connection instead of selecting a new peer.
- Cleanup: When the client disconnects, the module releases the bound upstream connection. Idle bound connections are also released after the configured timeout.
This approach mirrors the NTLM support available in NGINX Plus, making it available to open-source NGINX users through the NGINX NTLM module.
Installation
RHEL, CentOS, AlmaLinux, Rocky Linux
Install the NGINX NTLM module from the GetPageSpeed RPM repository:
sudo dnf install https://extras.getpagespeed.com/release-latest.rpm
sudo dnf install nginx-module-ntlm
After installation, load the module in /etc/nginx/nginx.conf by adding the following line at the top of the file, before any other directives:
load_module modules/ngx_http_upstream_ntlm_module.so;
Verify the configuration is valid:
sudo nginx -t
Debian and Ubuntu
First, set up the GetPageSpeed APT repository, then install:
sudo apt-get update
sudo apt-get install nginx-module-ntlm
On Debian/Ubuntu, the package handles module loading automatically. No
load_moduledirective is needed.
Configuration Directives
The NGINX NTLM module provides two directives, both used inside the upstream block.
ntlm
Syntax:  ntlm [connections];
Default: ntlm 100;
Context: upstream
Enables NTLM connection binding for the upstream group. The optional connections parameter sets the maximum number of bound connections to cache per worker process. The default value of 100 is suitable for most deployments.
When this directive is present, the module intercepts peer selection for requests that carry NTLM or Negotiate authentication headers and binds the upstream connection to the client connection.
Requests without NTLM or Negotiate headers pass through to the standard round-robin balancer without any binding.
ntlm_timeout
Syntax:  ntlm_timeout timeout;
Default: ntlm_timeout 60s;
Context: upstream
Sets the idle timeout for bound upstream connections. If no request from the bound client arrives within this period, the upstream connection is closed and the cache slot is freed.
For environments where NTLM-authenticated sessions are long-lived — for example, users accessing SharePoint through a browser — consider increasing this value to avoid re-authentication:
upstream sharepoint {
    server 10.0.0.5:443;
    ntlm;
    ntlm_timeout 300s;
}
Basic Configuration
Here is a minimal working configuration for proxying NTLM authentication to a Windows backend:
upstream windows_backend {
    server 10.0.0.5:80;
    ntlm;
}

server {
    listen 80;
    server_name intranet.example.com;

    location / {
        proxy_pass http://windows_backend;
        proxy_http_version 1.1;
        proxy_set_header Connection "";
    }
}
Two proxy settings are required for the NGINX NTLM module to work correctly:
proxy_http_version 1.1: NTLM connection binding relies on HTTP/1.1 keep-alive connections between NGINX and the upstream server. HTTP/1.0 closes the connection after each response, breaking the handshake.proxy_set_header Connection "": By default, NGINX sendsConnection: closeto the upstream. Setting it to an empty string allows the upstream connection to remain open for reuse.
Without these two directives, every request opens a new upstream connection and the NTLM handshake fails on step 3.
Advanced Configuration Examples
Multiple Backend Servers with Load Balancing
The NGINX NTLM module works with NGINX’s standard load balancing. Each client’s NTLM session is bound to whichever server the round-robin algorithm selected for the initial request:
upstream iis_farm {
    server 10.0.0.10:80;
    server 10.0.0.11:80;
    server 10.0.0.12:80 backup;
    ntlm 200;
    ntlm_timeout 120s;
}

server {
    listen 80;
    server_name app.example.com;

    location / {
        proxy_pass http://iis_farm;
        proxy_http_version 1.1;
        proxy_set_header Connection "";
        proxy_set_header Host $host;
        proxy_set_header X-Real-IP $remote_addr;
        proxy_set_header X-Forwarded-For $proxy_add_x_forwarded_for;
        proxy_set_header X-Forwarded-Proto $scheme;
    }
}
HTTPS Upstream (SSL/TLS to Backend)
If your Windows backend requires HTTPS, the NGINX NTLM module supports SSL connections to upstreams:
upstream exchange_backend {
    server mail.internal.example.com:443;
    ntlm;
    ntlm_timeout 180s;
}

server {
    listen 443 ssl;
    server_name mail.example.com;

    ssl_certificate /etc/pki/tls/certs/mail.example.com.crt;
    ssl_certificate_key /etc/pki/tls/private/mail.example.com.key;

    location / {
        proxy_pass https://exchange_backend;
        proxy_http_version 1.1;
        proxy_set_header Connection "";
        proxy_set_header Host $host;
        proxy_ssl_server_name on;
    }
}
Selective NTLM Proxying
You may want to apply NTLM binding only to specific paths while using standard proxying for static assets. This approach reduces the number of bound connections because static asset requests use the regular keepalive pool instead:
upstream app_backend {
    server 10.0.0.5:80;
    ntlm;
}

upstream static_backend {
    server 10.0.0.5:80;
    keepalive 32;
}

server {
    listen 80;
    server_name intranet.example.com;

    # Static assets do not need NTLM binding
    location ~* .(css|js|png|jpg|gif|ico|woff2?)$ {
        proxy_pass http://static_backend;
        proxy_http_version 1.1;
        proxy_set_header Connection "";
        expires 7d;
    }

    # Application paths need NTLM authentication
    location / {
        proxy_pass http://app_backend;
        proxy_http_version 1.1;
        proxy_set_header Connection "";
    }
}
Comparison with NGINX’s Native keepalive Directive
The NGINX NTLM module is based on the same codebase as NGINX’s built-in keepalive upstream module. However, there is a critical difference in connection reuse behavior:
| Feature | keepalive (native) |
ntlm (this module) |
|---|---|---|
| Connection pooling | Shared pool — any client may reuse any cached connection | Bound — each client reuses only its own upstream connection |
| Auth context preservation | No — connections are interchangeable | Yes — preserves NTLM/Negotiate authentication state |
| Idle timeout | keepalive_timeout |
ntlm_timeout |
| Max cached connections | keepalive parameter |
ntlm parameter |
| Non-auth requests | Pooled and reused | Pass through to round-robin (no binding) |
The native keepalive directive is the right choice for stateless backends where connection reuse improves performance. The ntlm directive is required when the upstream server maintains per-connection authentication state.
Do not use both directives in the same upstream block. The ntlm directive replaces keepalive — it already provides connection caching for authenticated requests.
Performance Considerations
- Memory usage: Each cached connection entry uses a small amount of memory (approximately 100 bytes per slot). With the default of 100 connections per worker and 4 worker processes, the NGINX NTLM module uses roughly 40 KB total.
- Connection overhead: Bound connections remain open for the duration of the
ntlm_timeout, even if idle. In environments with many concurrent NTLM users, size thentlmparameter accordingly to avoid running out of cache slots. - Worker process scaling: The connection cache is per-worker. With
worker_processes autoon a server with 8 CPU cores, each worker maintains its own pool of up tontlmconnections. The total number of cached connections across all workers equalsntlm × worker_processes. - Non-NTLM requests: Requests without NTLM or Negotiate headers incur no additional overhead. The module checks for the authentication header and falls through to the standard balancer immediately.
Sizing the Connection Cache
A good rule of thumb: set the ntlm parameter to the number of concurrent NTLM-authenticated users you expect per worker process. For most deployments, the default of 100 works well. If you serve 500 concurrent authenticated users with 4 workers, set it to at least 125:
upstream iis_backend {
    server 10.0.0.5:80;
    ntlm 150;
}
When the cache is full, the oldest idle connection is evicted to make room for new bindings. This means overloaded cache slots cause re-authentication rather than failures.
Security Best Practices
Restrict Backend Access
Ensure your NGINX server is the only path to the Windows backend. If clients can bypass NGINX and connect to the backend directly, the NTLM authentication still works, but you lose the benefits of centralized access control and logging:
# Only allow specific internal networks
server {
    listen 80;
    server_name intranet.example.com;

    allow 10.0.0.0/8;
    allow 172.16.0.0/12;
    allow 192.168.0.0/16;
    deny all;

    location / {
        proxy_pass http://windows_backend;
        proxy_http_version 1.1;
        proxy_set_header Connection "";
    }
}
Use HTTPS for Client Connections
NTLM transmits credentials in a format that, while not plaintext, is vulnerable to relay attacks when sent over unencrypted HTTP. Always terminate TLS at NGINX when using the NGINX NTLM module:
server {
    listen 443 ssl;
    server_name intranet.example.com;

    ssl_certificate /etc/pki/tls/certs/intranet.crt;
    ssl_certificate_key /etc/pki/tls/private/intranet.key;

    # Redirect HTTP to HTTPS
    error_page 497 =301 https://$host$request_uri;

    location / {
        proxy_pass http://windows_backend;
        proxy_http_version 1.1;
        proxy_set_header Connection "";
    }
}
Consider Kerberos Where Possible
NTLM is a legacy protocol with known security weaknesses, including susceptibility to relay attacks and pass-the-hash attacks. Microsoft recommends migrating to Kerberos where possible. The NGINX NTLM module also supports the Negotiate authentication scheme, which can negotiate Kerberos (SPNEGO) when both client and server support it.
Troubleshooting
HTTP 401 in a Loop
If the client repeatedly receives 401 Unauthorized responses, the NTLM handshake is failing — likely because the upstream connection is not being preserved.
Check these settings:
– Verify proxy_http_version 1.1; is set in the location block
– Verify proxy_set_header Connection ""; is present
– Confirm the ntlm directive is inside the correct upstream block
502 Bad Gateway
This typically means NGINX cannot connect to the upstream server.
Common causes:
– The backend server is down or unreachable
– SELinux is blocking the connection — run setsebool -P httpd_can_network_connect on on RHEL-based systems
– Firewall rules are blocking the upstream port
Authentication Works Initially but Fails Later
If users authenticate successfully but get logged out after some idle time, the ntlm_timeout is likely too short.
Solution: Increase the timeout to match your application’s session duration:
upstream backend {
    server 10.0.0.5:80;
    ntlm;
    ntlm_timeout 600s;
}
Module Not Loading
If nginx -t reports unknown directive "ntlm", the module is not loaded.
Solution: Add the load_module directive at the very top of nginx.conf, before the events block:
load_module modules/ngx_http_upstream_ntlm_module.so;
Connection Cache Exhaustion
If you see frequent re-authentication prompts under heavy load, the connection cache may be full.
Solution: Increase the ntlm parameter and check the NGINX error log with debug logging enabled to see cache eviction messages:
upstream backend {
    server 10.0.0.5:80;
    ntlm 500;
}
Conclusion
The NGINX NTLM module brings Windows authentication support to open-source NGINX by preserving upstream connections during the NTLM and Negotiate handshake process. It requires minimal configuration — just the ntlm directive in an upstream block and two proxy settings — and works transparently with NGINX’s existing load balancing and SSL features.
For environments that rely on Windows authentication through IIS, Exchange, or SharePoint, the NGINX NTLM module eliminates the need for NGINX Plus while providing the same NTLM proxying capability. For dynamic upstream management without reloads, see the NGINX Lua Upstream module.
The module source code is available on GitHub, and pre-built packages are available from the GetPageSpeed RPM repository and the GetPageSpeed APT repository.
Auth plus continuous validation. Authentication is one piece; making sure the auth path still runs after every refactor is another. GetPageSpeed Amplify runs scheduled gixy scans across every host and ties findings to live NGINX runtime metrics. Drop-in compatible with the deprecated nginx-amplify-agent (EOL January 2026).